Android
Do you want to setup your email for Android? Follow our simple step by step guide today and get your email setup in Android.
Android Mail Setup (Gmail App)
Step 1
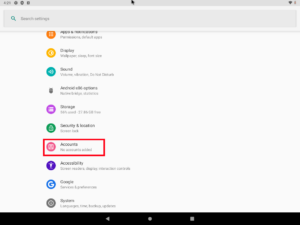
Locate and open your Settings app and find the “Accounts” option.

Step 2
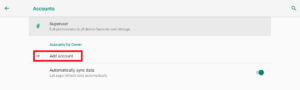
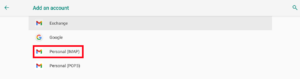
Tap on the “Add account” button and select the “Personal (IMAP)” option
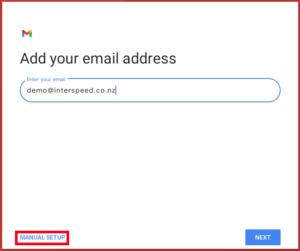
Step 3
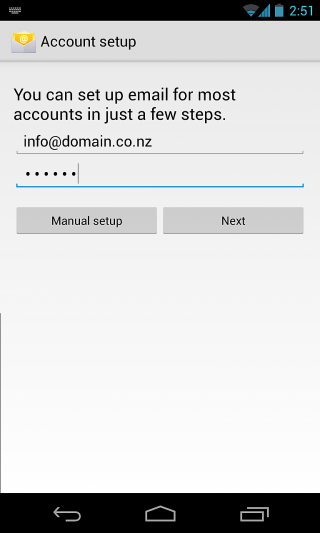
Type in your email address and then tap “Manual Setup” (Do not tap “Next”)
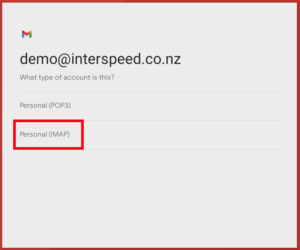
Step 4
Tap “Personal (IMAP)” and tap “Next”
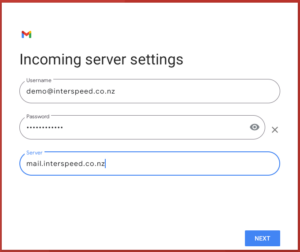
Step 5
Verify your email and password are correct and ensure the Server field is set as shown below
Incoming server settings
Username: <Your Email>
Password: <Your Email Password>
Server: mail.interspeed.co.nz
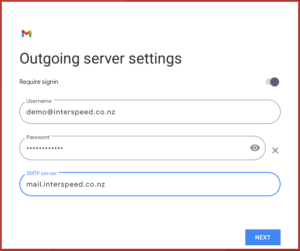
And the same for the next screen
Outgoing server settings
Require signin: On
Username: <Your Email>
Password: <Your Email Password>
Server: mail.interspeed.co.nz
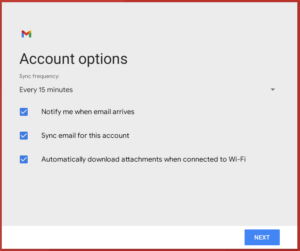
Step 6
Configure the following screen as you see fit, or leave as-is
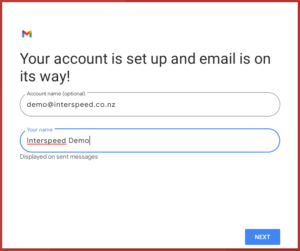
Step 7
Be sure to fill out the “Your Name” Field with your name (Not your Email Address) as this will be shown when you send emails to people instead of your email address.
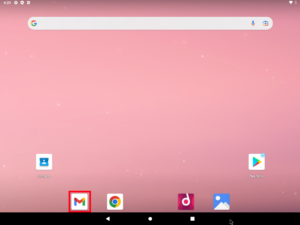
Step 8
You should be sent to your home screen after the previous step is completed. Navigate to your Gmail app and make your way through the prompts and to your mailbox. You should now be able to send and receive mail.


Still having issues?
Feel free to flick us an email at support (at) netvalue.nz
Legacy Android
Step 1
On your Android phone go to Email. If you already have an email account set up, you will need to touch Menu > Settings > Add. Enter Your Email address & Password (as per set up in mypanel). Touch Manual setup.
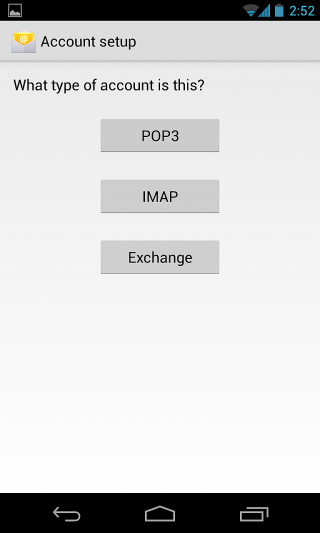
Step 2
Select IMAP as the account type.
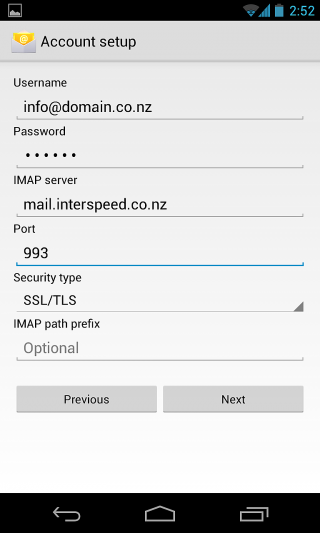
Step 3
Enter Username (Full email address), Password (as per Mypanel), IMAP Server: mail.interspeed.co.nz , Port: 993 , Security Type: SSL/TLS. Leave IMAP path prefix. Touch Next.
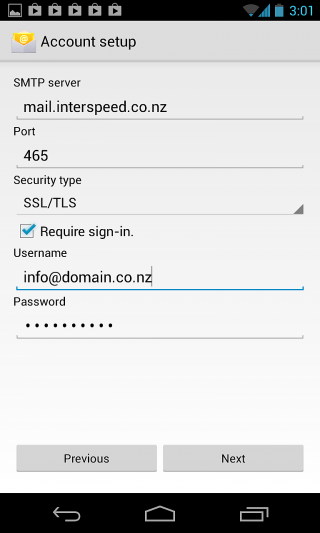
Step 4
SMTP Server: mail.interspeed.co.nz , Port: 465 , Security Type: SSL/TLS. Check Require sign-in, Enter Username (Full email address), Password (as per Mypanel), Touch Next.
Step 5
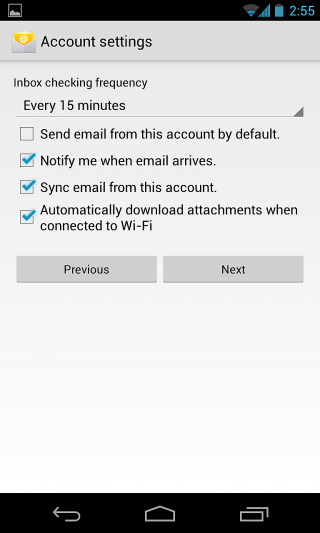
Leave settings as default, Touch Next.
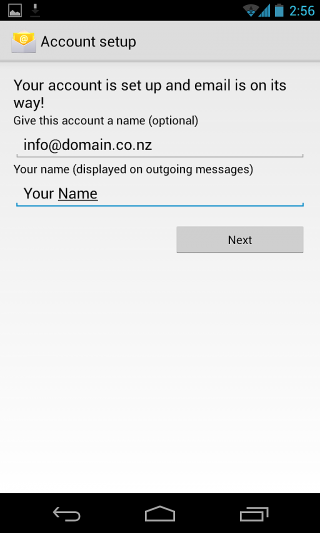
Step 6
Enter the Account Name (usually your full email address) and Your Name, Touch Next.