Outlook 2019 / Office 365
Setup
Step 1
Upon opening Outlook for the first time, you should be presented with the below screen. Fill out your email as required, click the “Advanced Options” link and tick the “Let me set up my account manually” option

Step 2
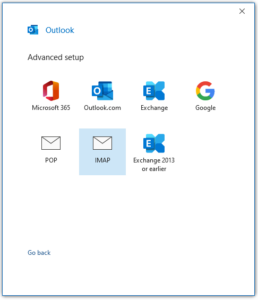
Click the “Connect” button. On the next screen that appears, click the “IMAP” option.
Step 3
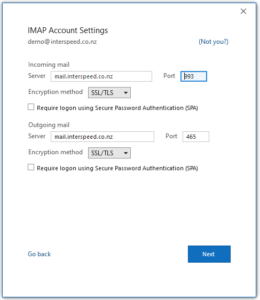
Fill out the following details as shown in the image below:
Incoming Mail
Server: mail.interspeed.co.nz
Port: 993
Encryption Method: SSL/TLS
Require logon using Secure Password Authentication (SPA): Unticked
Outgoing Mail
Server: mail.interspeed.co.nz
Port: 465
Encryption Method: SSL/TLS
Require logon using Secure Password Authentication (SPA): Unticked
Step 4
Click next and insert your password into the following screen

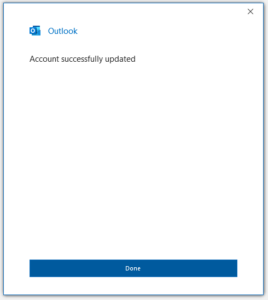
Step 5
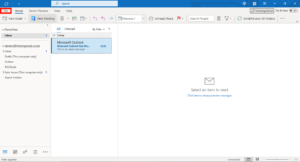
If you reach this screen, everything went well and Outlook has successfully added your mailbox! Please ensure “Set up Outlook Mobile on my phone, too” is unticked and click “Done”

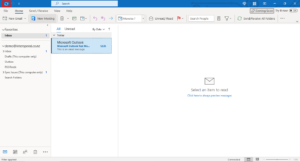
Step 6
Outlook should now begin to sync your mail. We recommend proceeding to the next stage of this guide as a form of preventative maintenance, however this is not totally required unless you face issues with sending/receiving mail.
Setting your Root Folder Path
Please follow this guide if you are facing issues with sending/receiving mail, or your Inbox within Outlook is appearing empty. We also recommend following this guide if you are setting up your mailbox for the first time, as this can prevent issues further down the line.
Step 1
From within your Outlook Program, click the “File” button on the top left of your screen
Step 2
On the screen (Headed “Account Information”) that appears, click the “Account Settings” drop-down box.
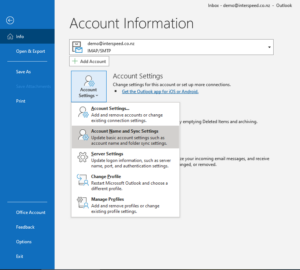
From the list that appears, click the “Account Name and Sync Settings” option
Step 3
A popup window labeled “IMAP Account Settings” should appear.
Please ensure the section highlighted in Red is filled out as it appears in the below image:
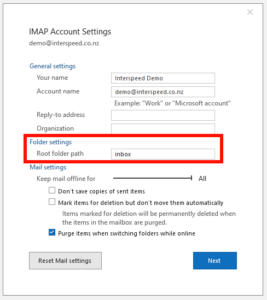
As shown above, the field labeled “Root Folder Path” should have “Inbox” inserted into it (Not including quotes, case insensitive).
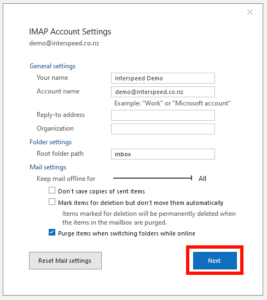
Step 4
Click the “Next” Button and then “Done” on the screen that follows.
Step 5
Now that setting has been applied, navigate back to your inbox and click the Refresh button on the top left of the screen and you should see your mail sync without issue
Still having issues?
Feel free to flick us an email at support (at) netvalue.nz